If you have created your HTPC following my previous post (here and here), you should have notice that OpenELEC will not automatically update and that the XBMC interface sometime can be really slow (especially when using the remote of your TV).
In this post I will show you how to fix the update and, in the next one, how to overclock a little the raspberry, so that the UI is more snappier. At least it worked for me.
The OpenELEC great team has released an official version for the raspberry pi, what you need to do to install it is to download the latest version from their site (at the end of the page you will find a section named “Raspberry Pi Builds” with the download link) and update the image you used following my post.
Once you have download the tar.bz2 file (at the moment of writing should be “OpenELEC-RPi.arm-2.99.1.tar.bz2”), just extract it in a folder of your choice. If you have trouble decompressing the files I suggest you to use WinRAR.
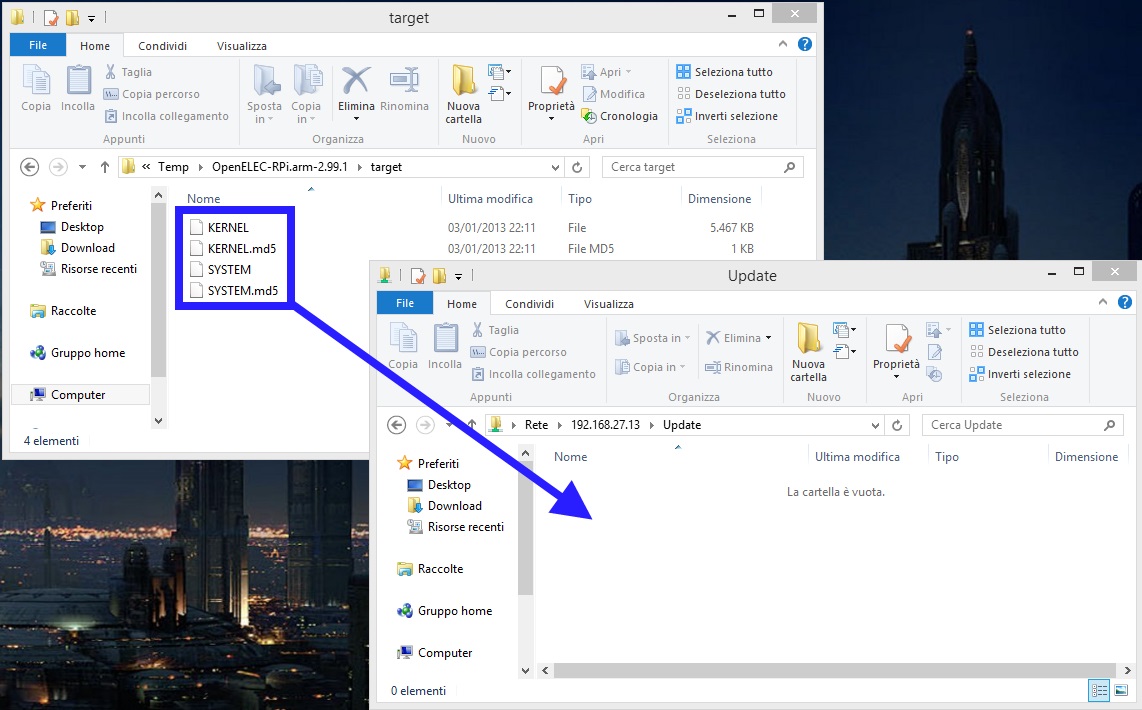
After extracting the files, you should end up with a folder like the one in the picture:

What you need to do now, is to copy the content of the folder “target”, in the folder “update” of your raspberry via your network connection (Wi-Fi or wired). If you have configured correctly your XBMC, you should be able to see the shared folders by simply putting the IP of your XBMC in the explorer’s window (in my case “\192.168.27.13”)

Now copy the four files from the “target” folder to the “update” folder:
The last step is to just reboot your raspberry. After that, you should see the raspberry checking the two md5 hashes and then installing the update. If everything goes well it will restart again and then load your updated XBMC. From now on, it should update automatically when a new version is released.
To check if you have automatic updates enabled, in your XBMC, go to “Programs” -> “OpenELEC OS Settings” and set “System Update” to “auto”.